The Web & iCal module allows you to use your soSIMPLE Calendar outside of the FileMaker product line.
Requirements
- On-premise or third-party-hosted FileMaker Server 17 or later
(Claris Cloud not supported for this module) - Web server with PHP enabled with cURL support.
note: it is technically possible to run PHP on the same server as FileMaker Server, but we don’t recommend it since Claris removed it from their installations. - Valid SSL certificates installed on both the FileMaker Server and the web server.
Prepare your FileMaker Server & data file
- Turn on the Data API from your FileMaker Server Admin Console
- Enable the Data API for one user, for the events you want to show on your calendar.
- Open the FileMaker file that contains the events you want to show on your calendar.
- Go to the security settings (File menu > Manage > Security) and create a user that will be used when interacting with the calendar, or select an existing user.
(note: you can enable multiple users if you want users to log into the web calendar with their own privileges).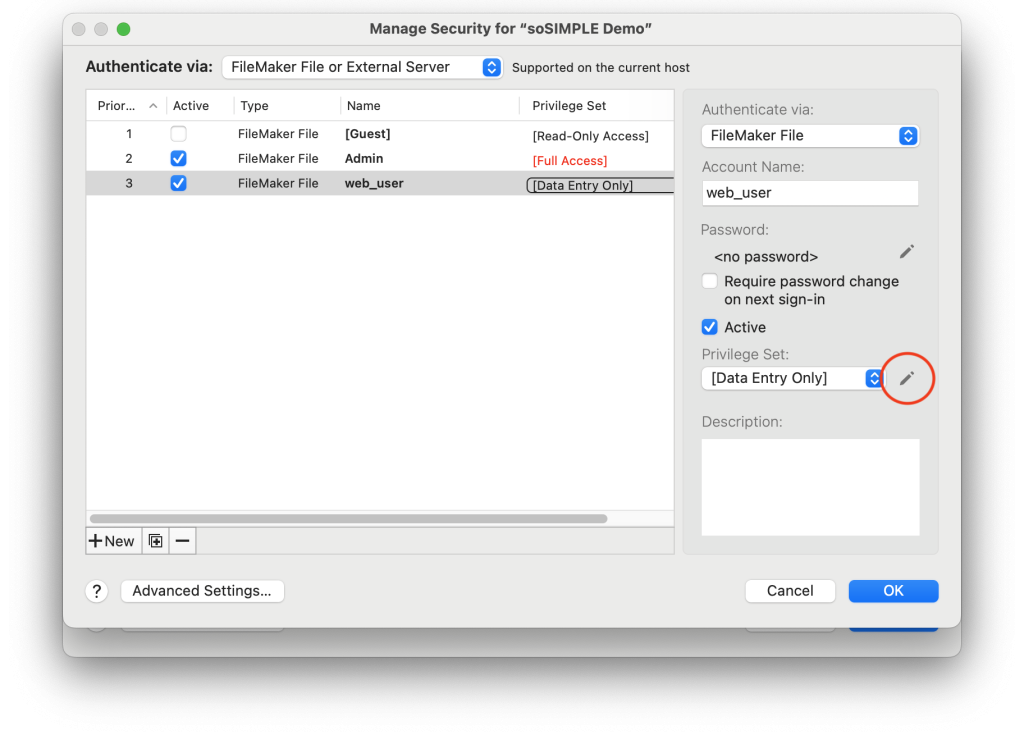
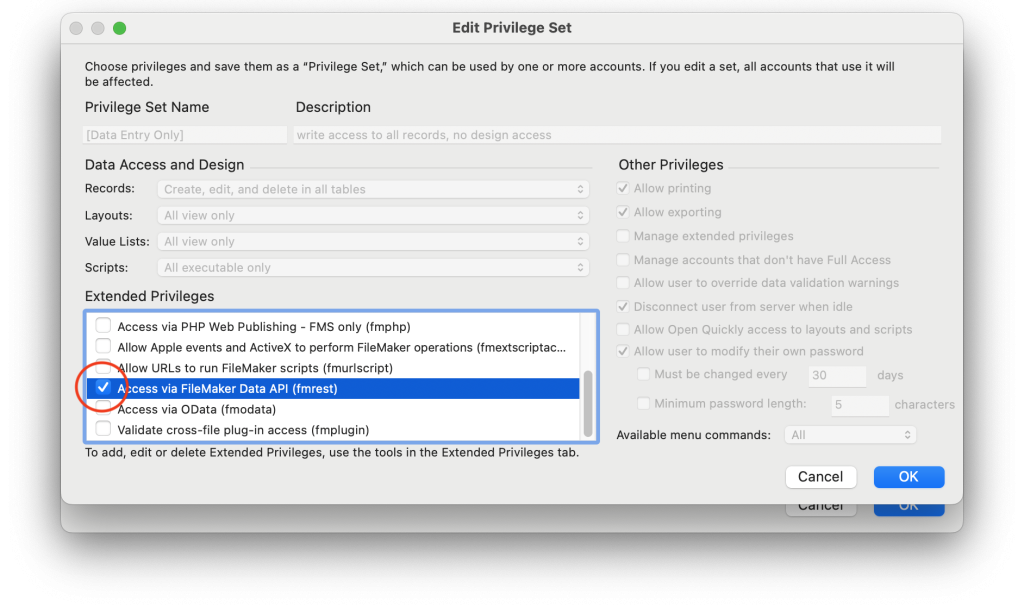
- Once you’ve selected a user, click the pencil next to the privilege set name and enable the “fmrest” extended privilege
- Notes:
- All other users sharing the same privilege set will also have Data API access.
- If you create a user specifically for the calendar, you can limit their access by (a) turning off the “fmapp” privilege so they can’t access the file from FileMaker Pro/Go and “webd” so they can’t access it through WebDirect and (b) limit the user to just the records and fields required for the calendar.
Install the soSIMPLE Calendar web pages
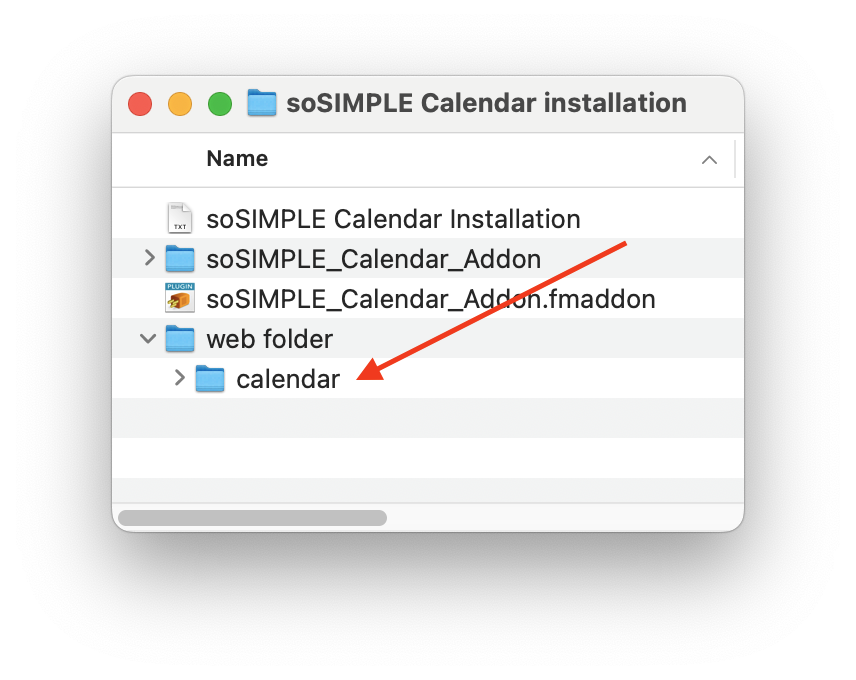
- Start by downloading the soSIMPLE Calendar package.
- Included in the package is a folder called “calendar”. Copy the entire folder to your web server in a public web folder.
Depending on the web host, you may need to upload this folder using a web browser or an FTP client. You can also rename this folder if you’d like. - Go to the web page.
Assuming you didn’t rename the folder, and you put it in your web root, the url will look like: https://<your server>/calendar/. - Notes:
- Depending on the web configuration, you may need to include the index page in the URL (https://<your server>/calendar/index.php)
- If you don’t see anything on the web page, or get an error, check your PHP log for errors. If you’re unable to understand the error, you can contact us for installation support.
Register soSIMPLE Calendar
If your calendar has not been set up, you should automatically redirect to the configuration page. If you didn’t, you can manually go there by typing in the url (https://<your server>/calendar/config/index.php)
Click on the Registration tab and fill in the License Key you received for “soSIMPLE Calendar Web & iCal Module.” This is a different key than the soSIMPLE Calendar Add-On key that you received. If you don’t have a key, you can use this calendar in demo mode. This mode will show a watermark indicating that you’re not registered, and periodic messages asking how it’s going. Once you register, those messages go away.
If you want to set up Google maps, you can get a key from Google. You don’t need to do this now to us the rest of the calendar.
Configure your calendar
If no data source has been set up, you should automatically redirect to the configuration page. If you didn’t, you can manually go there by typing in the url (https://<your server>/calendar/config/index.php)
Click on the Data Source tab and fill in the information for your FileMaker file. See our Data Source article for more information.
You might have to click the green plus button (“+”) to create your first data source.